Posted by: mitha.ismalyulii
886 View
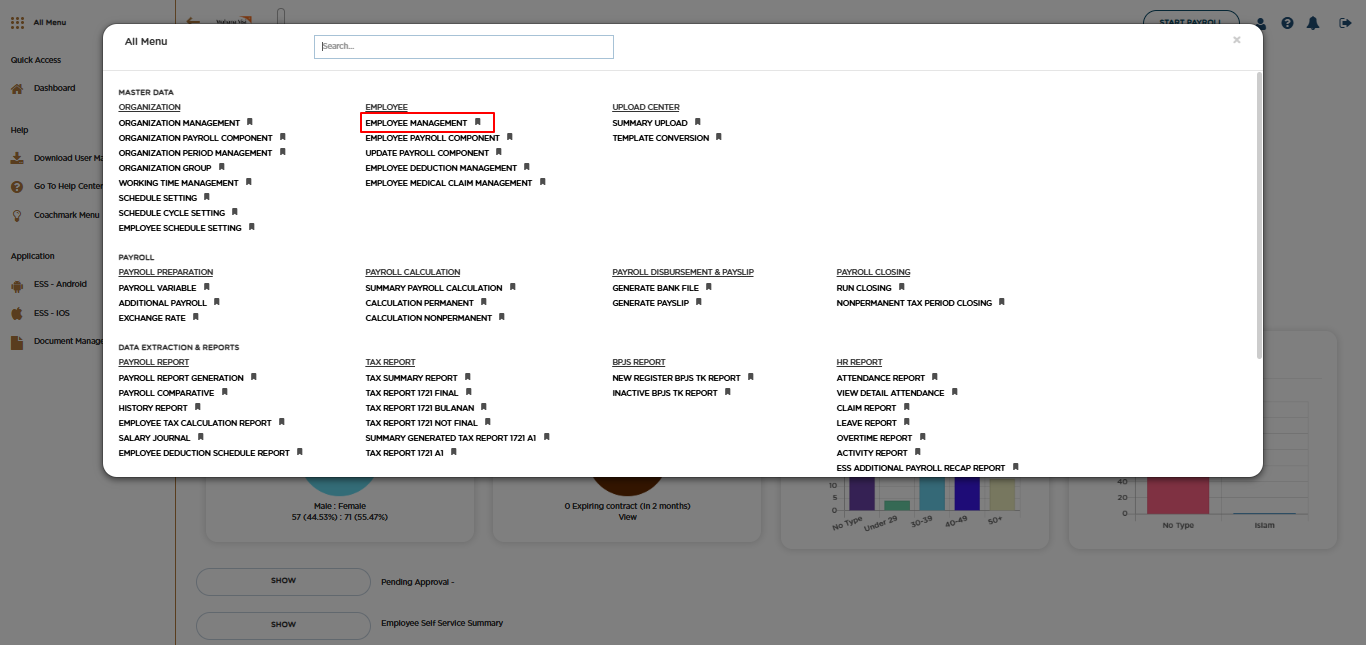
Employee Management
Employee Management berfungsi untuk mengelola semua informasi karyawan. Menu ini mencakup berbagai aspek penting, termasuk informasi pribadi karyawan yang menyimpan data identitas dan kontak, informasi pekerjaan yang mencakup detail posisi, departemen, dan riwayat pekerjaan, serta informasi penggajian yang menangani data gaji, tunjangan, dan potongan. Fitur-fitur dalam menu Karyawan meliputi proses menambahkan karyawan baru, mengubah informasi yang telah ada seperti alamat dan jabatan, serta mencatat riwayat perubahan struktur organisasi karyawan. Input data baru dan perubahan data yang sudah ada bisa dilakukan via halaman yang tersedia dan juga bisa dilakukan dengan proses upload untuk data dalam jumlah banyak.
Employee Management functions to manage all employee information. This menu covers various important aspects, including employee personal information that stores identity and contact data, job information that includes details of positions, departments, and work history, and payroll information that handles salary data, benefits, and deductions. The features in the Employee menu include the process of adding new employees, changing existing information such as addresses and positions, and recording the history of changes in employee organizational structures. Input of new data and changes to existing data can be done via the available pages and can also be done by uploading for large amounts of data.
Personal Information

Bukalah melalui link berikut:
https://www.benemica.com/Payroll/personalinformation/index
Open the following link :
https://www.benemica.com/Payroll/personalinformation/index

-
Klik tombol "New" untuk menambahkan karyawan baru.
Click the "New" button to add a new employee.

-
Isilah “New Personal Information” untuk menambahkan employee baru dan mengelola informasi pribadi karyawan.
Fill out the "New Personal Information" form to manage the employee's personal information.

-
Klik Save untuk menyimpan informasi.
Click "Save" to save the information.
Appointment Information

Setelah menyimpan informasi pribadi, lanjutkan ke bagian "Appointment Information" untuk mencatat dan mengelola informasi kepegawaian karyawan yang bersangkutan.
After saving personal information, proceed to the "Appointment Information" section to record and manage the employee's personnel information.

-
Isi field-field yang tersedia pada halaman "New Appointment Information" untuk mengelola data kepegawaian secara komprehensif, seperti tanggal bergabung, status, masa percobaan, nomor karyawan lama, lokasi kerja, informasi kontak, jam kerja, posisi, divisi, departemen, tingkatan, pusat biaya, penugasan khusus, dan alasan pengunduran diri.
Fill out the fields in "New Appointment Information" page to comprehensively manage employee data, such as join date, status, probation period, old employee number, work location, contact information, working time, position, division, department, grade, cost center, special assignment, and resignation reason.
-
Date of Hire: Tanggal karyawan mulai bergabung dengan perusahaan
-
Join Date: Tanggal karyawan mulai bergabung dengan Group perusahaan (bila ada).
-
Jika tidak ada group perusahaan maka Join Date bisa disamakan dengan Date of Hire
-
Status Information: Status karyawan didalam perusahaan
-
Employment Status - status karyawan yang didaftarkan pada perusahaan. Status ini akan mempengaruhi ke perhitungan payroll nanti nya
-
Employee Status - status keaktifan karyawan (Active, Resigned, Terminated, dll)
-
Effective Date - tanggal Employment Status dan Employee Status berlaku
-
-
End Date of Probation: Tanggal akhir masa percobaan karyawan.
-
Old Employee Number: nomor karyawan yang lama (jika ada). Ini untuk kondisi dimana karyawan di-hire kembali.
-
Work Location: Lokasi penugasan karyawan.
-
Contract Information: Informasi kontrak karyawan.
-
Working Time: Informasi mengenai jam kerja karyawan, termasuk kode, deskripsi, tanggal mulai, dan tanggal akhir. List Working Time yang dapat dipilih disini sesuai dengan data yang sudah disetting di level Organization
-
Position: Informasi mengenai posisi atau jabatan karyawan, termasuk kode, deskripsi, dan tanggal efektif. List Position yang dapat dipilih disini sesuai dengan data yang sudah disetting di level Organization
-
Division: Informasi mengenai divisi tempat karyawan bekerja. List Division yang dapat dipilih disini sesuai dengan data yang sudah disetting di level Organization
-
Department: Informasi mengenai departemen tempat karyawan bekerja, termasuk kode, deskripsi, dan tanggal efektif. List Department yang dapat dipilih disini sesuai dengan data yang sudah disetting di level Organization
-
Grade: Informasi mengenai tingkatan atau level karyawan, termasuk kode, deskripsi, dan tanggal efektif. List Grade yang dapat dipilih disini sesuai dengan data yang sudah disetting di level Organization
-
Cost Center: Cost Center yang didaftarkan untuk karyawan tersebut
-
Deputation: Informasi mengenai penugasan khusus karyawan.
-
Resign Reason: Alasan karyawan mengundurkan diri (jika ada).
-
Date of Hire: The date the employee started joining the company
-
Join Date: The date the employee started joining the company group (if any).
-
If there is no company group, the Join Date can be the same as the Date of Hire
-
Status Information: Employee status in the company
-
Employment Status - employee status registered in the company. This status will affect the rule payroll calculation applied for the employee
-
Employee Status - employee activity status (Active, Resigned, Terminated, etc.)
-
Effective Date - the validity date Employment Status and Employee Status
-
-
End Date of Probation: The end date of the employee's probation period.
-
Old Employee Number: old employee number (if any). This is for the situation where the employee is rehired.
-
Work Location: The employee's assignment location.
-
Contract Information: The employee's contract information.
-
Working Time: Information about employee working hours, including code, description, start date, and end date. The Working Time list that can be selected here is in accordance with the data that has been set at the Organization level.
-
Position: Information about employee positions, including codes, descriptions, and effective dates. The list of positions that can be selected here is in accordance with the data that has been set at the Organization level.
-
Division: Information about the division where the employee works. The Division list that can be selected here is in accordance with the data that has been set at the Organization level.
-
Department: Information about the department where the employee works, including code, description, and effective date. The list of departments that can be selected here is in accordance with the data that has been set at the Organization level.
-
Grade: Information about employee grades or levels, including codes, descriptions, and effective dates. The Grade list that can be selected here is in accordance with the data that has been set at the Organization level.
-
Cost Center: The cost center allocated to the employee.
-
Deputation: Information regarding the employee's special assignment.
-
Resign Reason: The reason for the employee's resignation (if any).

-
Klik Save untuk menyimpan informasi.
Click "Save" to save the information.
Tax Information

Selanjutnya kita dapat melengkapi ke tab “Tax Information” yang digunakan untuk mengelola informasi perpajakan terkait karyawan.
Next, we can move to the "Tax Information" tab to manage tax-related information for the employee.

-
Isi formulir "Create Tax Information" dengan data seperti nomor identifikasi pajak, tanggal efektif, tanggal berakhir, status pajak, kebijakan pajak gaji, pendapatan bersih sebelumnya, dan pajak yang telah dibayarkan sebelumnya.
Fill out the "Create Tax Information" form with data such as tax identification number, effective date, end date, tax status, salary tax policy, previous net income, and previous tax paid.
-
Employee ID: Nomor identifikasi unik karyawan yang digunakan dalam sistem. Nomor ini akan langsung terisi sesuai dengan karyawan yang dipilih
-
Tax ID: Nomor identifikasi pajak atau NPWP (Nomor Pokok Wajib Pajak) karyawan.
-
Effective Date: Tanggal efektif dari Nomor identifikasi pajak atau NPWP (Nomor Pokok Wajib Pajak) karyawan yang dimasukkan.
-
Revoke Date: Tanggal berakhirnya atau dicabutnya Nomor identifikasi pajak atau NPWP (Nomor Pokok Wajib Pajak) karyawan.
-
Tax Status: Status pajak karyawan, misalnya Lajang (Single), Menikah (Married) dan jumlah tanggungan yang akan menentukan tarif pajak.
-
Salary Tax Policy: Kebijakan atau aturan perpajakan yang diterapkan terhadap gaji karyawan.
-
Gross - Pajak akan dipotong dari Gaji Karyawan
-
Nett - Pajak akan ditanggung oleh Perusahaan
Pilihan pada field ini adalah aturan pajak di level Karyawan. Jika ada perbedaan aturan pemotongan pajak di level komponen gaji (Employee Payroll Component - EPC), dapat disesuaikan di level EPC
-
Previous Net Income: Pendapatan bersih karyawan dari pemberi kerja sebelumnya (bila ada). Informasi ini akan dipertimbangkan dalam perhitungan pajak karyawan yang bergabung di tengah tahun
-
Previous Tax Paid: Jumlah pajak yang telah dibayarkan oleh karyawan pada tempat kerja sebelumnya (bila ada). Informasi ini akan dipertimbangkan dalam perhitungan pajak karyawan yang bergabung di tengah tahun
-
Employee ID: The unique employee identification number used in the system. This number will be filled in directly according to the selected employee.
-
Tax ID: Employee's tax identification number or NPWP (Nomor Pokok Wajib Pajak).
-
Effective Date: The effective date of the Tax Identification Number or NPWP (Nomor Pokok Wajib Pajak) of the employee entered.
-
Revoke Date: The date of expiration or revocation of the employee's Tax Identification Number or NPWP (Nomor Pokok Wajib Pajak).
-
Tax Status: Employee tax status, for example Single, Married, and number of dependants that determines the tax rate.
-
Salary Tax Policy: Taxation policy or rules applied to employee salaries.
-
Gross - Tax will be deducted from Employee Salary
-
Nett - Tax will be borne by the Company
The options in this field are the tax rules at the Employee level. If there are differences in the tax deduction rules at the Employee Payroll Component (EPC) level, they can be adjusted at the EPC level.
-
Previous Net Income: Employee's net income from previous employer (if any). This information will be taken into account in calculating the tax of employees who join in the middle of the year.
-
Previous Tax Paid: The amount of tax paid by the employee at the previous place of employment (if any). This information will be taken into account in calculating the tax of employees who join in the middle of the year.

-
Klik Save untuk menyimpan informasi.
Click "Save" to save the information.
Create Address & Contact Information

-
Selanjutnya isi informasi pada tab “Create Address & Contact Information” untuk mencatat dan menyimpan informasi detail mengenai alamat dan kontak karyawan, baik alamat tempat tinggal, alamat tetap, maupun alamat surat-menyurat.
Next, fill out the information in "Create Address & Contact Information" tab to record and save detailed information about the employee's address and contact, including residential address, permanent address, and mailing address.
Catatan:
Corporate Email Address adalah field yang wajib diisi untuk kepentingan penggunaan Employee Self Service (ESS). Email pada field ini akan menjadi username pada saat login ke aplikasi Mobile dan Web ESS Benemica
Note:
Corporate Email Address is a mandatory field for the use of Employee Self Service (ESS). The email in this field will be the username when logging in to the Benemica Mobile and Web ESS applications.

-
Klik Save untuk menyimpan informasi
Click Save to save the information.
Payslip Information

Selanjutnya, lanjutkan ke tab “Payslip Information” untuk menentukan metode pendistribusian Payslip kepada karyawan.
Next, proceed to the "Payslip Information" tab to select the method of distributing Payslips to employees.

-
Isilah “Create Payslip Information” dengan data Payslip Distribution yang diinginkan untuk karyawan tersebut. Terdapat 3 jenis pilihan:
e-payslip: payslip didistribusikan menggunakan aplikasi ESS Web dan ESS Mobile
Email: payslip didistribusikan menggunakan Email
Hardcopy: payslip didistribusikan menggunakan Hardcopy. Pengguna harus mengunduh dan mencetak payslip untuk didistribusikan ke karyawan
Untuk tipe e-Payslip dan email, Username akan terisi langsung dengan Corporate Email Address yang sudah diisikan pada tab Address & Contact Information
Fill in “Create Payslip Information” with the desired Payslip Distribution data for the employee. There are 3 options:
e-payslip: payslip is distributed using the ESS Web and ESS Mobile applications
Email: payslip is distributed using Email
Hardcopy: payslip is distributed using Hardcopy. Users must download and print the payslip to be distributed to employees
For the e-Payslip and email types, the Username will be filled directly with the Corporate Email Address that has been filled in on the Address & Contact Information tab
-
Klik Save untuk menyimpan informasi.
Click Save to save the information.
Payroll Payment Information
Selanjutnya, lanjutkan ke tab “Payroll Payment Information” untuk mencatat dan memperbarui informasi terkait pembayaran gaji karyawan, seperti metode pembayaran, nomor rekening, jumlah, dan persentase gaji.
Next, proceed to the "Payroll Payment Information" tab to record and update information related to employee salary payments, such as payment method, account number, amount, and salary percentage.

-
Isilah “Create Payroll Information” dengan data seperti metode pembayaran, nomor rekening bank, jumlah gaji, dan persentase gaji.
Fill out the "Create Payroll Information" with data such as payment method, bank account number, salary amount, and salary percentage.
-
Employee ID - Name: Menampilkan nomor identifikasi dan nama karyawan.
-
Payment Type: Metode pembayaran gaji. Terdapat pilihan "Bank transfer" atau “Cash”.
-
Payment From Bank Account: Nomor rekening bank perusahaan yang digunakan untuk mentransfer gaji.
-
Employee Bank Account: Nomor rekening bank karyawan tempat menerima pembayaran gaji.
-
Account Number: Nomor rekening bank karyawan.
-
Bank Branch Code: Kode cabang bank rekening karyawan.
-
Currency: Mata uang yang digunakan untuk pembayaran.
-
Percentage: persentase gaji yang akan ditransfer ke rekening tersebut.
Jika hanya ada satu rekening yang akan digunakan untuk menerima gaji maka bisa diisi dengan 100.
Jika ada lebih dari satu rekening yang akan didaftarkan sebagai rekening penerima gaji, maka diisikan persentase yang akan diterima oleh masing-masing rekening. Total persentase harus 100.
-
Amount: Jumlah gaji yang diterima di rekening tersebut jika ada lebih dari 1 rekening dan tidak menggunakan Percentage untuk pembagian gaji ke lebih dari satu rekening. Jika Amount diisi, maka Priority juga wajib diisi.
Jika gaji yang diterima lebih dari yang diisikan di field Amount, maka kelebihan nilai gaji akan dimasukkan ke rekening dengan Priority terakhir.
-
Priority: Prioritas pembagian gaji jika field Amount diisi.
-
Employee ID - Name: Displays the employee's identification number and name.
-
Payment Type: Salary payment method. There are options "Bank transfer" or "Cash".
-
Payment From Bank Account: The company's bank account number used to transfer salaries.
-
Employee Bank Account: The employee's bank account number where the salary is received.
-
Account Number: The employee's bank account number.
-
Bank Branch Code: The employee's bank account branch code.
-
Currency: The currency used for payment.
-
Percentage: The percentage of salary that will be transferred to the account. If there is only one account that will be used to receive the salary, it can be filled with 100.
-
If there is more than one account that will be registered as a salary recipient account, then input the percentage that will be received by each account. The total percentage must be 100.
-
Amount: The amount of salary received in the account if there is more than 1 account and does not use Percentage to divide the salary into more than one account. If Amount is filled in, then Priority must also be filled in.
-
If the salary received is more than the amount filled in the Amount field, the remaining salary value will be transferred into the account with the last Priority.
-
Priority: Salary distribution priority if the Amount field is filled in.

-
Klik Save untuk menyimpan informasi.
Click Save for save the information.
Employee Document

Selanjutnya isilah tab “Employee Document” untuk mencatat dan mengelola dokumen-dokumen terkait karyawan.
Next, fill out the "Employee Document" tab to record and manage documents related to the employee.

-
Klik tombol New.
Click the “New” button.

-
Pilih dokumen yang ingin disimpan terkait dengan karyawan.
Select the document to be saved related to the employee.
-
Employee ID - Name: Menampilkan nomor identifikasi dan nama karyawan.
-
Type: Jenis dokumen yang akan diunggah atau dicatat, seperti CV, Sertifikat, Kontrak, dll.
-
Description: Deskripsi singkat mengenai dokumen yang akan diunggah.
-
Path: Lokasi penyimpanan file dokumen yang akan diunggah.
-
Employee ID - Name: Displays the identification number and name of the employee.
-
Type: The type of document to be uploaded or recorded, such as CV, Certificate, Contract, etc.
-
Description: A brief description of the document to be uploaded.
-
Path: The storage location for the document file to be uploaded.

-
Klik Save untuk menyimpan informasi.
Click "Save" to save the information.
Employee Payroll Component

Selanjutnya, isilah tab “Employee Payroll Component” untuk mencatat dan mengatur komponen-komponen penggajian karyawan.
Next, fill out the "Employee Payroll Component" tab to record and manage the components of employee payroll.

-
Isilah “New Employee Payroll Component”.
Fill out the "New Employee Payroll Component”.
-
Employee ID - Name: Menampilkan nomor identifikasi dan nama karyawan.
-
Code: kode komponen gaji karyawan. Kode yang dapat dipilih adalah yang sudah disetup di level Organization Payroll Component (OPC).
-
Description: Deskripsi mengenai komponen penggajian. Field ini akan langsung terisi sesuai dengan kode yang dipilih
-
Currency: Mata uang yang digunakan untuk komponen penggajian, dalam hal ini Rupiah (IDR). Field ini akan langsung terisi sesuai dengan kode yang dipilih. Bisa diubah sesuai dengan kebutuhan karyawan yang bersangkutan
-
Calculation Group: Kelompok perhitungan yang digunakan untuk komponen penggajian. Field ini akan langsung terisi sesuai dengan kode yang dipilih
-
Taxable Type: Menampilkan apakah komponen ini masuk kedalam perhitungan pajak atau tidak. Field ini akan langsung terisi sesuai dengan kode yang dipilih
-
Tax Deduction: Menampilkan apakah komponen ini merupakan komponen yang menjadi pengurang pajak atau tidak. Field ini akan langsung terisi sesuai dengan kode yang dipilih
-
Tax Policy: Kebijakan pajak yang diterapkan untuk komponen penggajian. Field ini akan langsung terisi sesuai dengan kode yang dipilih
-
Frequency: Frekuensi pembayaran komponen penggajian, Regular/Irregular. Field ini akan langsung terisi sesuai dengan kode yang dipilih
-
Amount Type: Tipe perhitungan komponen. Fix Amount atau Formula. Field ini akan langsung terisi sesuai dengan kode yang dipilih
-
Calculation Basis: Dasar perhitungan komponen penggajian, misalnya hari kerja. Field ini akan langsung terisi sesuai dengan kode yang dipilih
-
Start Effective Date: Tanggal mulai value komponen tersebut efektif.
-
End Effective Date: Tanggal berakhirnya value komponen tersebut efektif.
-
Value/Percent: Nilai dari komponen gaji
-
Remark: Catatan atau keterangan tambahan terkait komponen penggajian.
-
Employee ID - Name: Displays the employee's identification number and name.
-
Code: employee salary component code. The codes that can be selected are those that have been set up at the Organization Payroll Component (OPC) level.
-
Description: Description of the payroll component. This field will be filled in directly according to the selected code
-
Currency: Currency used for the payroll component, in this case Rupiah (IDR). This field will be filled in directly according to the selected code. Can be changed according to the needs of the employee concerned
-
Calculation Group: Calculation group used for the payroll component. This field will be filled in directly according to the selected code
-
Taxable Type: Displays whether this component is included in the tax calculation or not. This field will be filled in directly according to the selected code
-
Tax Deduction: Displays whether this component is a component that is a tax deduction or not. This field will be filled in directly according to the selected code
-
Tax Policy: Tax policy applied to the payroll component. This field will be filled in directly according to the selected code. Can be changed according to the needs of the employee
-
Frequency: Frequency of payroll component payments, Regular/Irregular. This field will be filled directly according to the selected code
-
Amount Type: Component calculation type. Fix Amount or Formula. This field will be filled directly according to the selected code
-
Calculation Basis: The basis for calculating payroll components, for example working days. This field will be filled directly according to the selected code
-
Start Effective Date: The start date of the effective value of the component.
-
End Effective Date: The end date of the effective value of the component.
-
Value/Percent: The value of the salary component
-
Remark: Additional notes or information related to the payroll component.

-
Klik Save untuk menyimpan informasi komponen penggajian.
Click "Save" to save the payroll component information.
Upload New Employee Personal Information
Untuk memasukkan data employee, juga bisa dilakukan dengan cara unggah/upload. Template upload dapat di-dowload terlebih dahulu dari sistem dalam bentuk excel dan kemudian dilengkapi sebelum diupload kembali ke sistem Benemica.
To input employee data, you can also upload it. The upload template can first be downloaded from the system in Excel format, completed, and then re-uploaded to the Benemica system.
-
Klik “Upload New” kemudian klik “Template” untuk mengunduh template yang dapat diisi. Pilih template sesuai dengan jenis karyawan yang akan diupload.
Click “Upload New” then click “Template” to download a fillable template. Select a template according to the type of employee to be uploaded.

-
Lengkapi template yang sudah diunduh
Complete the downloaded template -
Klik “Choose File” untuk memilih template yang sudah dilengkapi dan klik “Upload” untuk mengunggah
Click “Choose File” to select a completed template and click “Upload” to upload.

-
Sistem akan mengarahkan ke halaman “Summary Upload”. User dapat mengecek status upload dan melakukan approve untuk upload yang sudah dilakukan
The system will direct you to the “Summary Upload” page. Users can check the upload status and approve the uploads that have been made.
Upload Update Employee Personal Information
Untuk mengubah data karyawan yang sebelumnya sudah ada di dalam sistem, juga bisa dilakukan dengan cara unggah/upload. Template upload dapat di-dowload terlebih dahulu dari sistem dalam bentuk excel dan kemudian dilengkapi sebelum diupload kembali ke sistem Benemica.
To update employee data already in the system, you can also use the upload method. The upload template can be downloaded from the system in Excel format, completed, and then re-uploaded to the Benemica system.
-
Klik “Upload Update” kemudian klik “Template” untuk mengunduh template yang dapat diisi. Pilih template sesuai dengan jenis update yang akan diupload.
Click “Upload Update” then click “Template” to download a fillable template. Select a template according to the type of update to be uploaded.

-
Lengkapi template yang sudah diunduh.
Complete the downloaded template. -
Pilih “Upload Type” dan klik “Choose File” untuk memilih template yang sudah dilengkapi dan klik “Upload” untuk mengunggah.
Select “Upload Type” and then click “Choose File” to select a completed template and click “Upload” to upload.

-
Sistem akan mengarahkan ke halaman “Summary Upload”. User dapat mengecek status upload dan melakukan approve untuk upload yang sudah dilakukan.
The system will direct you to the “Summary Upload” page. Users can check the upload status and approve the uploads that have been made.